您知道那些工作中必须完成的繁琐任务吗:更新配置文件、复制粘贴文件、更新 Jira 票证。
时间长了就会累积起来。这在我 2016 年为一家在线游戏公司工作时的情况非常明显。当我需要为游戏构建可配置模板时,这份工作有时会非常有意义,但大约 70% 的时间都花在了制作这些模板的副本和部署重新制作的实现上。
什么是重新制作?
该公司对重新制作的定义是使用相同的游戏机制、屏幕和元素定位,但更改视觉美观,例如颜色和资产。因此,在“石头剪刀布”这样简单的游戏中,我们将创建一个带有以下基本资产的模板。

但是,当我们重新制作它时,我们将使用不同的资产,并且游戏仍然可以正常运行。如果您看一下像 Candy Crush 或 Angry Birds 这样的游戏,您会发现它们有许多相同游戏的变种。通常是万圣节、圣诞节或复活节版本。从商业角度来看,这非常有意义。
现在……回到我们的实现。我们每个游戏都将共享同一个捆绑的 JavaScript 文件,并加载一个包含不同内容和资产路径的 JSON 文件。结果是什么?

将可配置值提取到 JSON 文件中的好处是,您可以修改属性,而无需重新编译/构建游戏。使用 Node.js 和 Mozilla 创建的原始 Breakout 游戏,我们将演示一个非常简单的示例,说明如何创建可配置模板,以及如何使用命令行从模板中创建版本。
我们的游戏
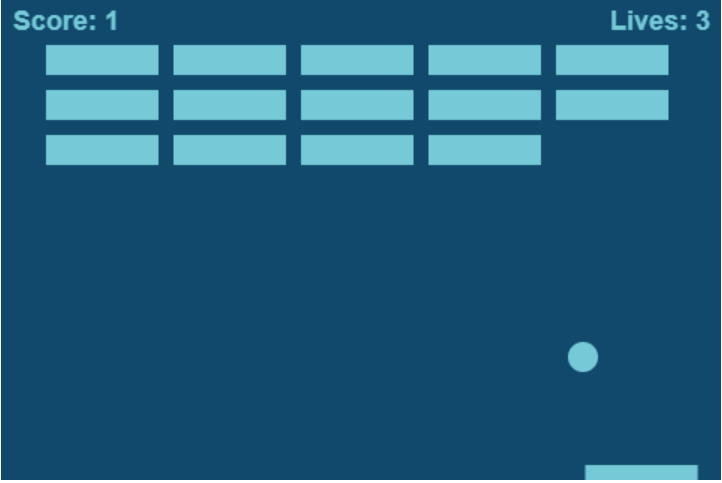
这就是我们将要制作的游戏。MDN Breakout 的重新制作版本,基于现有源代码。

主色将用于绘制文本、球拍、球和方块,而次色将用于绘制背景。我们将以深蓝色背景和浅天蓝色前景对象为例。
先决条件
您需要确保以下内容
- 您已安装 Git - https://git-scm.cn/downloads
- 您已安装 Node - https://node.org.cn/en/download
- 您拥有一个 GitHub 帐户 - https://github.com
- 您已将仓库克隆到本地 - https://github.com/smks/nobot-examples.git
- 您已在
nobot-examples项目的根目录中运行npm install。 - 最后,通过在项目的根目录中通过终端运行
npm run gameServe,您将运行本地服务器。
我们调整了原始的 Firefox 实现,以便我们首先读取 JSON 文件,然后使用 HTML Canvas 构建游戏。游戏将从我们的 game.json 文件中读取主色和次色。
{
  "primaryColor": "#fff",
  "secondaryColor": "#000"
}
我们将使用本书 Automating with Node.js 中的示例 20。源代码可以从 这里找到。
在本地克隆仓库后,打开一个新的命令行(Windows 上为 CMD,类 Unix 操作系统上为 Terminal),并切换到以下目录。
$ cd nobot-examples/examples/020请记住,游戏服务器应该在另一个终端中运行。
我们的 JSON 文件位于名为 template 的目录中的 index.html 文件旁边。每当我们想要进行新的发布/复制时,我们将从此目录中复制文件。
<!DOCTYPE html>
<html>
<head>
  <meta charset="utf-8" />
  <meta name="viewport" content="width=device-width, initial-scale=1">
  <title>Paddle Game</title>
  <style>
    * {
      padding: 0;
      margin: 0;
    }
    canvas {
      background: #eee;
      display: block;
      margin: 0 auto;
    }
  </style>
</head>
<body>
  <canvas id="game" width="480" height="320"></canvas>
  <script type="text/javascript" src="../../core/game-1.0.0.js"></script>
</body>
</html>
您在上面看到,我们发布的每个游戏都将指向同一个核心捆绑 JavaScript 文件。让我们看一下核心目录下的 JavaScript 实现。
不要过多地关注游戏的工作原理,而要关注我们如何将值注入游戏使其可配置。
(function boot(document) {
  function runGame(config) {
    const canvas = document.getElementById('game');
    canvas.style.backgroundColor = config.secondaryColor;
    // rest of game source code gets executed... hidden for brevity
    // source can be found here: https://git.io/vh1Te
  }

  function loadConfig() {
    fetch('game.json')
      .then(response => response.json())
      .then(runGame);
  }

  document.addEventListener('DOMContentLoaded', () => {
    loadConfig();
  });
}(document));
源代码使用 ES6 功能,可能无法在旧版浏览器中运行。如果遇到问题,请通过 Babel 运行。
您可以看到,我们正在等待 DOM 内容加载,然后调用名为 loadConfig 的方法。这将向 game.json 发起 AJAX 请求,获取我们的 JSON 值,并在检索到它们后,将初始化游戏并分配源代码中的样式。
以下是一个设置背景颜色的配置示例。
const canvas = document.getElementById('game');
canvas.style.backgroundColor = config.secondaryColor; // overriding color here
因此,现在我们有了可配置的模板,我们可以继续创建一个 Node.js 脚本,该脚本将允许用户将游戏的名称和颜色作为选项传递给我们的新脚本,或者提示用户输入:游戏的名称、主色,然后是次色。我们的脚本将强制执行验证,以确保两种颜色都采用十六进制代码格式(例如 #101b6b)。
当我们想要创建一个新的游戏重新制作版本时,我们应该能够运行此命令来生成它
$ node new-reskin.js --gameName='blue-reskin' --gamePrimaryColor='#76cad8' --gameSecondaryColor='#10496b'上面的命令将立即构建游戏,因为它具有发布重新制作版本所需的三个值。
我们将创建这个脚本 new-reskin.js,这个文件执行以下步骤
- 它将读取命令行中传递的选项,并将它们存储为变量。可以通过查看 process 对象 (
process.argv) 来读取选项。 - 它将验证这些值,确保游戏名称和颜色未定义。
- 如果存在任何验证问题,它将提示用户在继续之前重新正确输入。
- 现在它已经有了这些值,它将复制模板目录,并将它的副本放置到 releases 目录中,并将新目录命名为我们为游戏提供的名称。
- 然后,它将读取刚刚创建的 releases 目录下的 JSON 文件,并使用我们传递的值(颜色)覆盖这些值。
- 最后,它将提示用户查看他们是否希望在浏览器中打开游戏。它添加了一些便利性,而不是让我们尝试记住 URL。
这是完整的脚本。稍后我们将逐步讲解它。
require('colors');
const argv = require('minimist')(process.argv.slice(2));
const path = require('path');
const readLineSync = require('readline-sync');
const fse = require('fs-extra');
const open = require('opn');
const GAME_JSON_FILENAME = 'game.json';

let { gameName, gamePrimaryColor, gameSecondaryColor } = argv;

if (gameName === undefined) {
  gameName = readLineSync.question('What is the name of the new reskin? ', {
    limit: input => input.trim().length > 0,
    limitMessage: 'The project has to have a name, try again'
  });
}

const confirmColorInput = (color, colorType = 'primary') => {
  const hexColorRegex = /^#([A-Fa-f0-9]{6}|[A-Fa-f0-9]{3})$/;
  if (hexColorRegex.test(color)) {
    return color;
  }
  return readLineSync.question(`Enter a Hex Code for the game ${colorType} color `, {
    limit: hexColorRegex,
    limitMessage: 'Enter a valid hex code: #efefef'
  });
};

gamePrimaryColor = confirmColorInput(gamePrimaryColor, 'primary');
gameSecondaryColor = confirmColorInput(gameSecondaryColor, 'secondary');

console.log(`Creating a new reskin '${gameName}' with skin color: Primary: '${gamePrimaryColor}' Secondary: '${gameSecondaryColor}'`);

const src = path.join(__dirname, 'template');
const destination = path.join(__dirname, 'releases', gameName);
const configurationFilePath = path.join(destination, GAME_JSON_FILENAME);
const projectToOpen = path.join('https://:8080', 'releases', gameName, 'index.html');

fse.copy(src, destination)
  .then(() => {
    console.log(`Successfully created ${destination}`.green);
    return fse.readJson(configurationFilePath);
  })
  .then((config) => {
    const newConfig = config;
    newConfig.primaryColor = gamePrimaryColor;
    newConfig.secondaryColor = gameSecondaryColor;
    return fse.writeJson(configurationFilePath, newConfig);
  })
  .then(() => {
    console.log(`Updated configuration file ${configurationFilePath}`green);
    openGameIfAgreed(projectToOpen);
  })
  .catch(console.error);

const openGameIfAgreed = (fileToOpen) => {
  const isOpeningGame = readLineSync.keyInYN('Would you like to open the game? ');
  if (isOpeningGame) {
    open(fileToOpen);
  }
};
在脚本的顶部,我们要求需要执行该过程的包。
colors用于使用绿色或红色文本表示成功或失败。minimist用于更轻松地将参数传递给我们的脚本并可选地解析它们。在不提示输入的情况下传递输入。path用于构造模板和新游戏目的地的路径。readline-sync用于在缺少信息时提示用户输入。fs-extra使我们可以复制粘贴我们的游戏模板。这是对原生fs模块的扩展。opn是一个跨平台库,将在完成时在浏览器中打开我们的游戏。
当您在 nobot-examples 存储库的根目录中运行 npm install 时,上面大多数模块应该已经下载/安装了。其余的是 Node 的原生模块。
我们检查游戏名称是否通过命令行作为选项传递,如果没有,我们提示用户输入。
// name of our JSON file. We store it as a constant
const GAME_JSON_FILENAME = 'game.json';

// Retrieved from the command line --gameName='my-game' etc.
let { gameName, gamePrimaryColor, gameSecondaryColor } = argv;

// was the gameName passed?
if (gameName === undefined) {
  gameName = readLineSync.question('What is the name of the new reskin? ', {
    limit: input => input.trim().length > 0,
    limitMessage: 'The project has to have a name, try again'
  });
}
因为我们的两个值都需要是十六进制代码,所以我们创建了一个函数,它可以对两种颜色进行检查:主色和次色。如果用户提供的颜色没有通过我们的验证,我们将提示用户输入颜色,直到通过为止。
// Does the color passed in meet our validation requirements?
const confirmColorInput = (color, colorType = 'primary') => {
  const hexColorRegex = /^#([A-Fa-f0-9]{6}|[A-Fa-f0-9]{3})$/;
  if (hexColorRegex.test(color)) {
    return color;
  }
  return readLineSync.question(`Enter a Hex Code for the game ${colorType} color `, {
    limit: hexColorRegex,
    limitMessage: 'Enter a valid hex code: #efefef'
  });
};
我们使用上面的函数来获取主色和次色。
gamePrimaryColor = confirmColorInput(gamePrimaryColor, 'primary');
gameSecondaryColor = confirmColorInput(gameSecondaryColor, 'secondary');
在接下来的代码块中,我们正在打印到标准输出 (console.log),以确认将在构建游戏过程中使用的值。接下来的语句正在准备相关文件和目录的路径。
src 将指向模板目录。destination 将指向 releases 下的新目录。将更新其值的配置文件将驻留在我们创建的这个新游戏目录下。最后,为了预览我们的新游戏,我们使用我们之前启动的本地服务器的路径来构造 URL。
console.log(`Creating a new reskin '${gameName}' with skin color: Primary: '${gamePrimaryColor}' Secondary: '${gameSecondaryColor}'`);
const src = path.join(__dirname, 'template');
const destination = path.join(__dirname, 'releases', gameName);
const configurationFilePath = path.join(destination, GAME_JSON_FILENAME);
const projectToOpen = path.join('https://:8080', 'releases', gameName, 'index.html');
在解释后的代码中,我们
- 将模板文件复制到 releases 目录。
- 创建后,我们将读取原始模板值的 JSON。
- 使用新的配置对象,我们覆盖用户输入提供的现有主色和次色。
- 我们重写 JSON 文件,使其具有新值。
- 更新 JSON 文件后,我们询问用户是否希望在浏览器中打开新游戏。
- 如果出现任何错误,我们将捕获错误并记录下来。
fse.copy(src, destination)
  .then(() => {
    console.log(`Successfully created ${destination}`green);
    return fse.readJson(configurationFilePath);
  })
  .then((config) => {
    const newConfig = config;
    newConfig.primaryColor = gamePrimaryColor;
    newConfig.secondaryColor = gameSecondaryColor;
    return fse.writeJson(configurationFilePath, newConfig);
  })
  .then(() => {
    console.log(`Updated configuration file ${configurationFilePath}`green);
    openGameIfAgreed(projectToOpen);
  })
  .catch(console.error);
以下是复制完成后调用的函数。然后,它将提示用户查看他们是否希望在浏览器中打开游戏。用户用 y 或 n 响应
const openGameIfAgreed = (fileToOpen) => {
  const isOpeningGame = readLineSync.keyInYN('Would you like to open the game? ');
  if (isOpeningGame) {
    open(fileToOpen);
  }
};
让我们看看在不传递任何参数时它是如何工作的。您可以看到它没有中断,而是提示用户输入它需要的 value。
$ node new-reskin.js
What is the name of the new reskin? blue-reskin
Enter a Hex Code for the game primary color #76cad8
Enter a Hex Code for the game secondary color #10496b
Creating a new reskin 'blue-reskin' with skin color: Primary: '#76cad8' Secondary: '#10496b'
Successfully created nobot-examples\examples\020\releases\blue-reskin
Updated configuration file nobot-examples\examples\020\releases\blue-reskin\game.json
Would you like to open the game? [y/n]: y
(opens game in browser)
我的游戏在我的本地主机服务器上自动打开并开始运行,并使用了新的颜色。太棒了!
哦……我已经损失了一条命。现在,如果你导航到 releases 目录,你会看到一个名为 blue-reskin 的新目录。它包含我们在脚本执行期间输入的 JSON 文件中的值。
以下是我通过运行相同命令制作的几个其他版本。你可以想象,如果你正在发布可以配置不同图像、声音、标签、内容和字体的游戏,你将拥有一个基于相同机制的丰富的游戏库。

更棒的是,如果利益相关者和设计师在 Jira 票证中拥有所有这些信息,你可以将 Jira API 集成到 Node 脚本中,以便在没有用户提供任何输入的情况下注入这些值。太棒了!

这是 使用 Node.js 自动化 中的众多示例之一。在这本书中,我们将探讨一个更高级的示例,使用“石头剪刀布”作为从头开始创建的构建工具的基础。
- 彩色印刷版: http://amzn.eu/aA0cSnu
- Kindle 版: https://amzn.to/2JPTk7q
- Kobo 版: https://www.kobo.com/gb/en/ebook/automating-with-node-js
- Leanpub 版: https://leanpub.com/automatingwithnodejs